If traveling the open road or living off grid is your passion, you will find that most RV sales options already have an AC unit installed. However, if it doesn’t have AC or your current one finally gives out, there are many reasons to replace it. Best of all, with a few basic tools you can install the unit yourself.
Benefits of Having an Air-Conditioned RV
New RVers are often surprised to discover just how warm it can get in an RV, especially during hot summers. However, an air conditioner can quickly cool down the space, and most large units will have one or more units that sit atop their travel trailers. This benefits folks in many ways such as:
- Cooling occupants off after working or playing in the heat.
- Spending less time and fuel traveling seeking places to take respite from the warmth.
- Coming home to a cool space whenever you want, giving your more freedom overall.
Tips for Installing an RV AC Unit
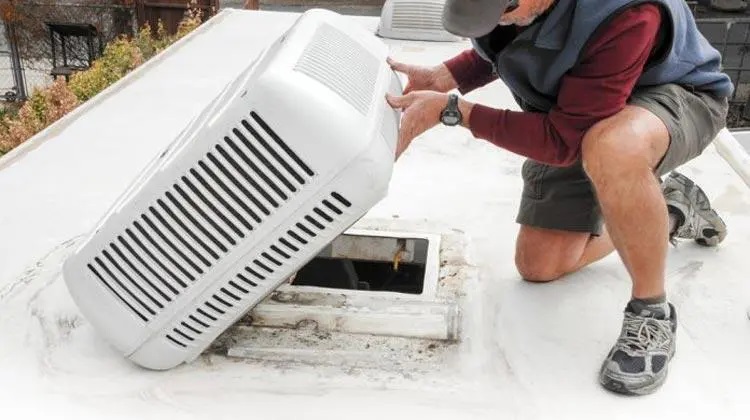
If you have an old unit installed you will need to remove the old one before beginning. Remove the four screws or bolts holding the shroud on the unit and remove it along with any old flashing, sealant or putty residue around the base and outlet hole.
Next, take the new RV AC unit to the top of the camper’s duct hole, a task simplified with another person inside below to help with centering and alignment. Be sure to read the installation instructions to ensure the assembly flange is faced properly. Follow the instructions for your model before tightening the bolts into the air conditioner.
The final step is getting the electrical wired up by attaching the new wires between the ceiling assembly and the junction box. Wiring nuts should come with the unit, and you will connect white wires to white, black to black, and the green ground wire to the bare line ground. Plug the harness from the rooftop AC to the control assembly and cover with the mounting bracket. Test and enjoy the coolness.