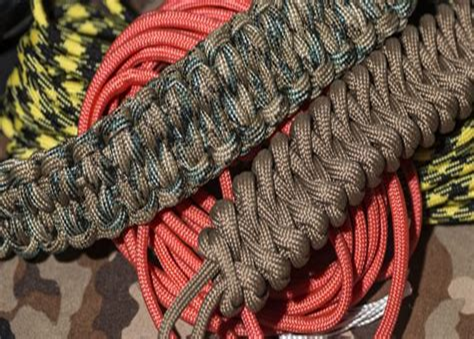
750 Paracord bracelets are fascinating accessories that you can easily make yourself. The core of the bracelet consists of a sleeve and a buckle, and these two parts differ depending on what your bracelet is supposed to look like. There are literally thousands of methods and designs for making such decorative cords. For the best 750 paracord, buy from Tough Grid
Paracord bracelets are popular types of survival gear. They’re actually easy to make as long as you have a little bit of knowledge. Here, we will walk you through the whole process of making one which includes cutting the cord, weaving it, and finishing things off with a clasp.
You can’t leave home without the right supplies. In this case, that means paracord. It’s what you need to make a survival bracelet.
You’ll also need a buckle and a few tools, most of which you probably have around the house. You will need a lighter, scissors or a knife, and a ruler or measuring tape.
In all likelihood, you won’t want to make just one bracelet. That’s why making several bracelets is a good idea. After all, if you’re going on a hiking trip or camping excursion, you’ll want to take more than one with you.
How to Make Paracord Bracelets
What you need:
-Two strands of 550 paracord
-Scissors -Lighter or match -A hole puncher
Take the two strands of paracord and make them into a large loop. These are the inner strands of the bracelet. Take the right strand, go under the left, then pull it back through the loop. You will have one strand on each side of the loop. Now take the right strand over the left, then pull it back through the loop. This step is called a reverse wrap. Do this again, alternating sides every time. For every four times, you go over a strand, you will only go under once. Continue until you reach about 12 inches for an adult bracelet or 8 inches for a child’s bracelet. This will be the center section of the bracelet.
Now take your two inner strands and wrap them around each other to form a tight circle or square knot. This is your first half hitch knot. Pull hard on both ends until it is snug against your wrist or ankle.
Now cut off any excess paracord on either side of your bracelet and melt the ends with a lighter or match to avoid fraying when you wear them.
You can also do this by submerging the ends of the cord in hot water for five minutes or so.
After melting the ends, tie a knot on each end of the cord about three inches from each end. This will keep the melted portions from unraveling and help tie the bracelet on your arm by preventing it from sliding off too quickly.
Conclusion
The paracord world is wide and varied, and we can’t possibly hope to cover it all in a single article. But we hope that you found this article to be an excellent introduction to its many possibilities and applications. And like we said: while it’s not the kind of thing you wear every day on your wrist or on your neck, paracord is definitely something worth knowing about; it’s suitable for people who go outdoors (hunting, hiking) and people who like DIY projects (making bracelets). So if you like to be prepared on the go, there’s almost no better way than paracord bracelets. But don’t believe us—try them out today.